
Survival
Bus setup, fuel & wheels
Use Z to place or attach parts, keep the bus supplied with fuel, and carry replacement wheels before the later stages of a run. Check the vehicle before leaving each terminal.
On this page
Attach the part, then check the result
The official control list assigns building and attachment to Z. The opening of the team walkthrough shows players fitting wheels before the first departure. Pick up the part, use the attachment control at the bus and check its position before moving on.
If a part is still being carried, it has not solved the vehicle problem. Separate loose cargo from fitted equipment, and avoid placing objects where the driver needs a clear view. Use E for equipping or using an item and Q when you need to drop it.
Budget fuel before optional upgrades
The solo walkthrough repeatedly spends terminal proceeds on gas to sustain the next section of road. It also recommends gas cans over coal for that fast-clear route. This is a route recommendation; the amount to buy depends on your current fuel, remaining journey and available cash.
Do not spend the whole budget on a new weapon and leave without the fuel or ammunition needed to use it. Sell spare items first, reserve enough for the next stretch, then decide what improvement solves the biggest remaining problem.
- Check the fuel situation before browsing equipment.
- Sell the items your group has agreed are spare.
- Buy fuel and matching ammunition for the next objective.
- Leave a reserve for unexpected needs rather than filling every slot with optional loot.
Carry a spare wheel
In Ricoko’s September 4 route, Basic Wheels are prepared at the workbench around 2:23. Later, around 7:39, damaged wheels make those replacements useful. The lesson is to prepare the replacement before a late-run failure interrupts your journey.
Read the current workbench requirements when making a wheel. Keep the replacement accessible, and let the driver know before removing or replacing a fitted part. Spare wheels are transport insurance; they should not be sold with ordinary duplicates.
Keep the interior usable
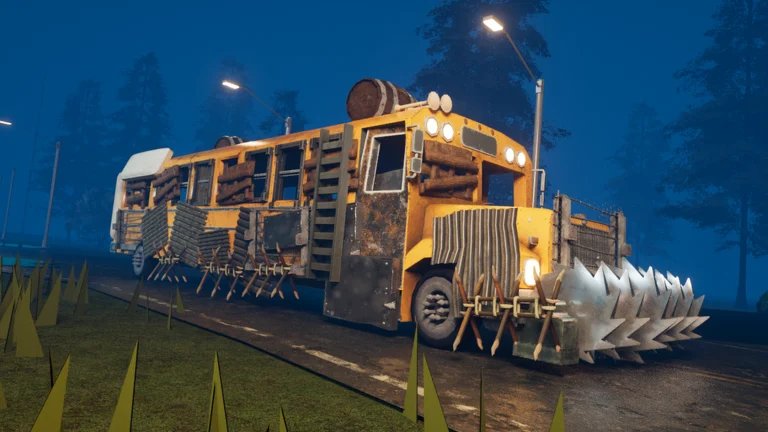
Official artwork shows a reinforced bus with attached defenses, while the team footage includes players adding wooden pieces. Prioritize a layout that still lets the group board, see threats and reach supplies.
The bus is also where coordination problems become expensive. Announce a stop, avoid leaving the driver unaware that somebody is outside, and check whether the group is ready before accelerating away. A finished vehicle layout should help the journey instead of making routine actions awkward.
Before every departure
For solo play, use the same checklist with fewer roles. For a team, assign the driver the departure check and let another player track fuel and supplies. This keeps a short terminal stop from becoming a long repair stop on the road.
- Wheels fitted and replacement parts reachable.
- Fuel checked after the last purchase or refuel.
- Driver can see and control the vehicle.
- Everyone has a route back into the bus.
- Gun users have matching ammunition and have reloaded.
- Quest characters and rescued NPCs accounted for.
Watch the gameplay
Sources
- Last Stop [Beta] — The Hidden Route on Roblox ↗
- Last Stop Roblox How to Solo Easy Fast Win for Beginners ↗
- How we beat Last Stop Roblox ↗
Found a change in the Beta? Send a correction.