
Database
Weapons & a practical starter loadout
For an accessible solo loadout, Ricoko recommends an Iron Sword for routine fights and a Revolver with Medium Ammo for the final boss. Keep a melee backup when using any gun.
On this page
A loadout you can actually support
The strongest weapon choice is affected by the ammunition and supplies you can carry. A new gun can be an upgrade only if you can keep it usable through the next encounter. Keep your current weapon until the replacement is equipped and supplied.
Ricoko’s solo walkthrough replaces the starting Shovel with an Iron Sword and keeps a Revolver for Fred. The video specifically calls for Medium Ammo for the Revolver. This is a demonstrated beginner route, rather than a universal damage ranking for every rarity or Beta update.
Weapons seen in gameplay
Use Y to inspect the weapon you actually find. Damage, rarity, price and attachments should be read from that item in the current build. A weapon name alone does not tell you the full cost of keeping it in service.
| Weapon | Role in a run | What to plan for |
|---|---|---|
| Shovel | Early melee option | Replace when a more useful melee weapon is available. |
| Iron Sword | Routine melee combat | Keep as a backup when gun ammunition runs low. |
| Revolver | Ranged option used for Fred in the solo route | Carry Medium Ammo; reload before the final encounter. |
| Shotgun / Double Barrel | Close-range gun choices shown in the team run | Buy the matching ammunition before a dungeon. |
| Sniper Rifle | Long-range gun shown in the team run | Check the item and ammunition type with Inspect. |
| Assault Rifle | Gun used in the later team run | Watch ammunition consumption during extended fights. |
Ammunition is part of the purchase
Both walkthroughs show why ammunition deserves its own budget. The team repeatedly runs low during the Anubis dungeon, after spending shots on the approach and enemies before the boss. Arriving with a gun is only the first half of the preparation.
At a terminal, identify which gun each teammate is keeping, buy ammunition for those weapons and reload before departure. Avoid carrying several incompatible guns if doing so leaves too little room for food, fuel and the ammunition you actually need.
- Revolver: the solo guide explicitly uses Medium Ammo.
- Other guns: inspect your item and match the ammunition displayed by the game.
- Keep a melee weapon available for ordinary threats and emergencies.
- Check ammunition again before entering a dungeon or starting the final encounter.
Choosing for Fred or Anubis
The Fred solo route uses a Revolver and aims at the head. The Anubis team run uses a mixture of weapons and exposes a longer resource problem: fighting through the dungeon can consume the supplies meant for the boss.
Choose the loadout around that job. For a Fred clear, preserve the weapon and ammo you intend to use at the end. For Anubis, prepare for the approach as well as the fight and agree who is carrying spare supplies. If you are trying to cure Fred, the ending decision takes priority over shooting.
Search the item reference
| Item | Category | Use in your run | Read more |
|---|---|---|---|
| 01Iron Sword | Weapons | Melee weapon recommended in the solo walkthrough. | Guide |
| 02Revolver | Weapons | Used with Medium Ammo in the Fred solo clear. | Guide |
| 03Shovel | Weapons | Early melee option shown at the start of the run. | Guide |
| 04Shotgun / Double Barrel | Weapons | Gun choices shown during the team walkthrough. | Guide |
| 05Sniper Rifle | Weapons | Ranged weapon used during the team run. | Guide |
| 06Assault Rifle | Weapons | Gun used in later sections of the team run. | Guide |
| 07Medium Ammo | Supplies | Ammunition used for the Revolver in the solo route. | Guide |
| 08Gas can | Supplies | Fuel purchased at terminals in the solo route. | Guide |
| 09Coal | Supplies | Fuel discussed in both gameplay walkthroughs. | Guide |
| 10Basic Wheel | Bus parts | Craft with 2 Wood and 4 Scrap; carry a spare for wheel replacement. | Guide |
| 11Empty cans | Quest items | Noodle payment for Junk King; two Empty Cans also go into a Generator Card. | Guide |
| 12Cure potion | Quest items | Required to cure Fred and finish without killing him. | Guide |
| 13Wood | Supplies | Needed for Basic Wheels, the Crafting Table, wooden structures and storage. | Guide |
| 14Scrap | Supplies | Used across wheels, structures, grills, lighting and the Auto Turret. | Guide |
| 15Duct Tape | Supplies | Used in the Auto Turret, Snow Plough Grill and Generator Card. | Guide |
| 16Battery | Supplies | Required by the Auto Turret and the mounted Lamp. | Guide |
| 17Spring | Supplies | Required by Spiked Wheels, Golden Wheels and the Saw Grill. | Guide |
| 18Metal Pipe | Supplies | Used in Spiked Wheels, Snow Plough Grill and Saw Grill. | Guide |
| 19Gold Bar | Supplies | One Gold Bar is needed in the Golden Wheel recipe. | Guide |
| 20Rope | Supplies | Used with Wood for a Wooden Ladder, or with Candle and Scrap for a Lantern. | Guide |
| 21Candle | Supplies | Used in the Flame Grill and the handheld Lantern. | Guide |
| 22Spiked Wheel | Bus parts | Damages enemies when the wheel rolls over them. | Guide |
| 23Golden Wheel | Bus parts | A wheel intended for faster travel; no speed percentage is shown. | Guide |
| 24Wooden Wall | Bus parts | A full wooden wall for a bus build. | Guide |
| 25Wooden Half-Wall | Bus parts | A shorter wooden wall for the bus. | Guide |
| 26Wooden Door | Bus parts | A door that opens and closes. | Guide |
| 27Wooden Window | Bus parts | A wooden window frame. | Guide |
| 28Metal Wall | Bus parts | A full-height sheet metal wall. | Guide |
| 29Metal Half-Wall | Bus parts | A lower sheet metal wall. | Guide |
| 30Log Grill | Bus parts | A heavy front-mounted log grill. | Guide |
| 31Snow Plough Grill | Bus parts | Clears barriers from the road. | Guide |
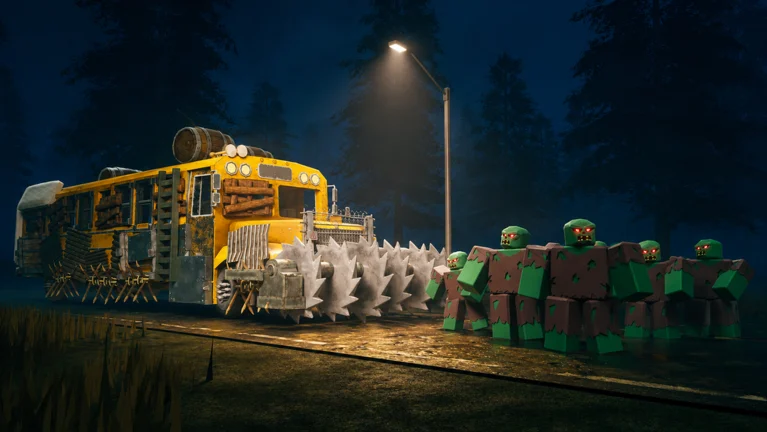
| 32Saw Grill | Bus parts | Uses spinning saws to damage enemies. | Guide |
| 33Flame Grill | Bus parts | Burns enemies that touch it. | Guide |
| 34Wooden Chest | Bus parts | Stores items in a wooden chest. | Guide |
| 35Wooden Ladder | Bus parts | Provides a climbable ladder for your build. | Guide |
| 36Lamp | Bus parts | A mounted light for the dark sections of the route. | Guide |
| 37Auto Turret / Turret | Bus parts | A mounted gun that automatically aims and fires at nearby hostiles. | Guide |
| 38Crafting Table | Supplies | A workbench used to craft items. | Guide |
| 39Generator Card | Supplies | An access card that starts a generator building. | Guide |
| 40Lantern | Supplies | A portable light to carry through dark areas. | Guide |
No matching items. Try a different name or category.
40 items · See each guide for item use and gameplay sources.
Watch the gameplay
Sources
- Last Stop [Beta] — The Hidden Route on Roblox ↗
- Last Stop Roblox How to Solo Easy Fast Win for Beginners ↗
- How we beat Last Stop Roblox ↗
Found a change in the Beta? Send a correction.